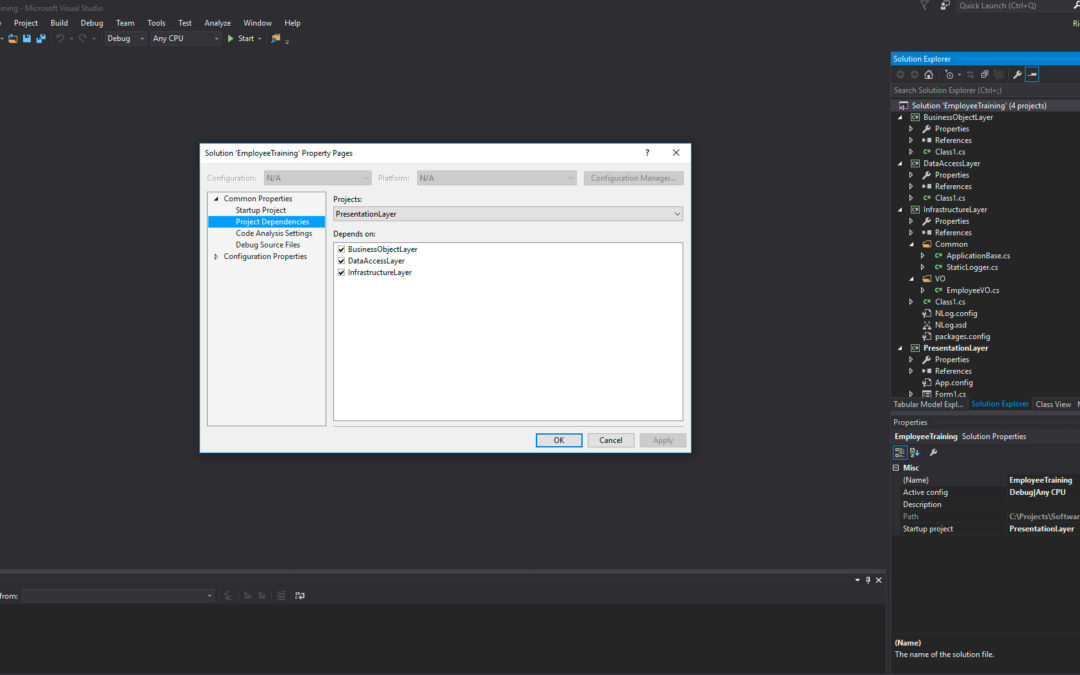
To create anything other than trivial programs you’ll need to structure and organize your Visual Studio solution in a way that enables separation of concerns. In this post I’ll show you how to create a complex Visual Studio solution consisting of multiple sub-projects that reflects the organization of a multi-layered application architecture. Before I get started, take a look at the following video.
Reference Application Architecture
Figure 1 shows the reference architecture I’ll use to structure the Visual Studio solution:
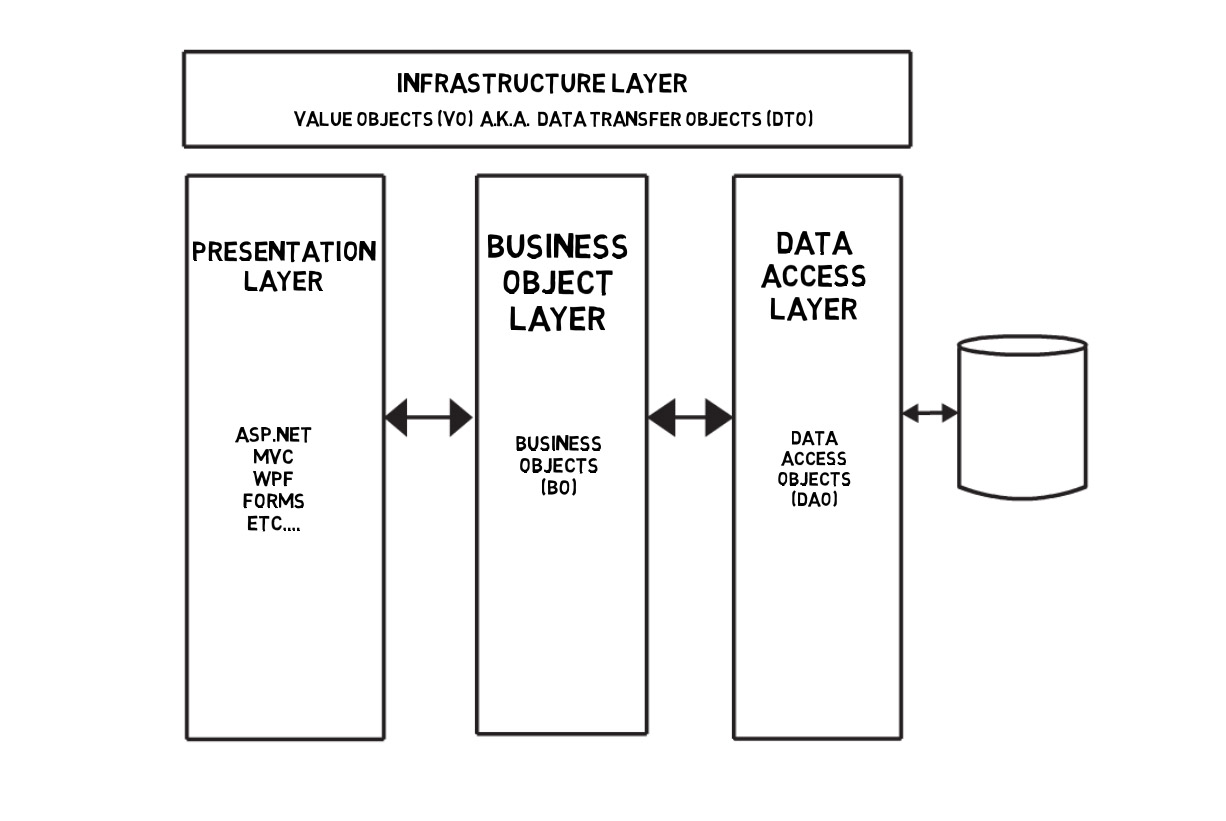
Figure 1 – Multi-Layered Application Architecture
- Infrastructure Layer – Contains Value Objects (VOs), (A.K.A. Data Transfer Objects (DTOs), which are lightweight objects used to pass data between application layers. I show the Infrastructure Layer spanning all the other layers because they all have a dependency upon the Infrastructure Layer. In addition to VOs, the Infrastructure Layer will contain any common code, objects, or functionality required by all the other layers.
- Data Access Layer – Contains Data Access Objects (DAOs) which are used to interact with the database/data store.
- Business Object Layer – Contains Business Objects (BOs), which provide a logical grouping of related functionality. Transaction control resides in this layer as well.
- Presentation Layer – This is generally the User Interface (UI) and can be implemented in many different technologies including ASP.NET, Windows Presentation Foundation (WPF), Windows Forms, MVC, etc.
All these application layers represent separate sub-projects in a complex Visual Studio solution. The Infrastructure, Data Access, and Business Object layers are library projects meaning they will be set to compile to .dll files, whereas the Presentation Layer will be an executable or a web application.
Create the Solution
Start by creating the Presentation Layer project. Launch Visual Studio. In this post I’ll be using Visual Studio 2015. Select File -> New -> Project. In the New Project window select Windows Forms Application. Set the project’s Name, Location, and Solution Name. For the project’s name I’ve entered “PresentationLayer”. I’ve set the location to a Projects folder located on my desktop, and I’ve set the Solution Name to “EmployeeTraining”. See figure 2.
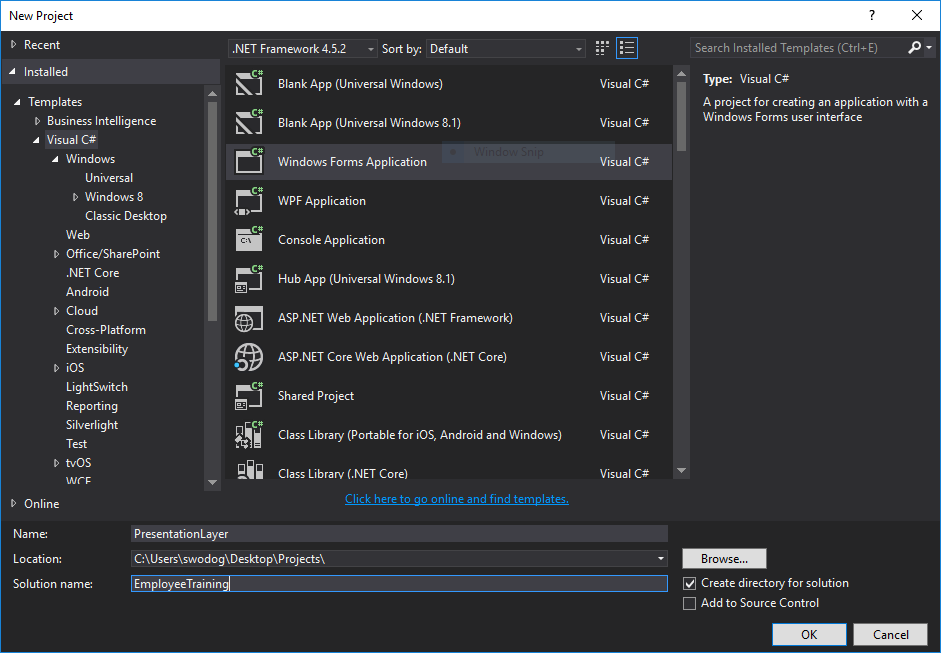
Figure 2 – Creating PresentationLayer Project
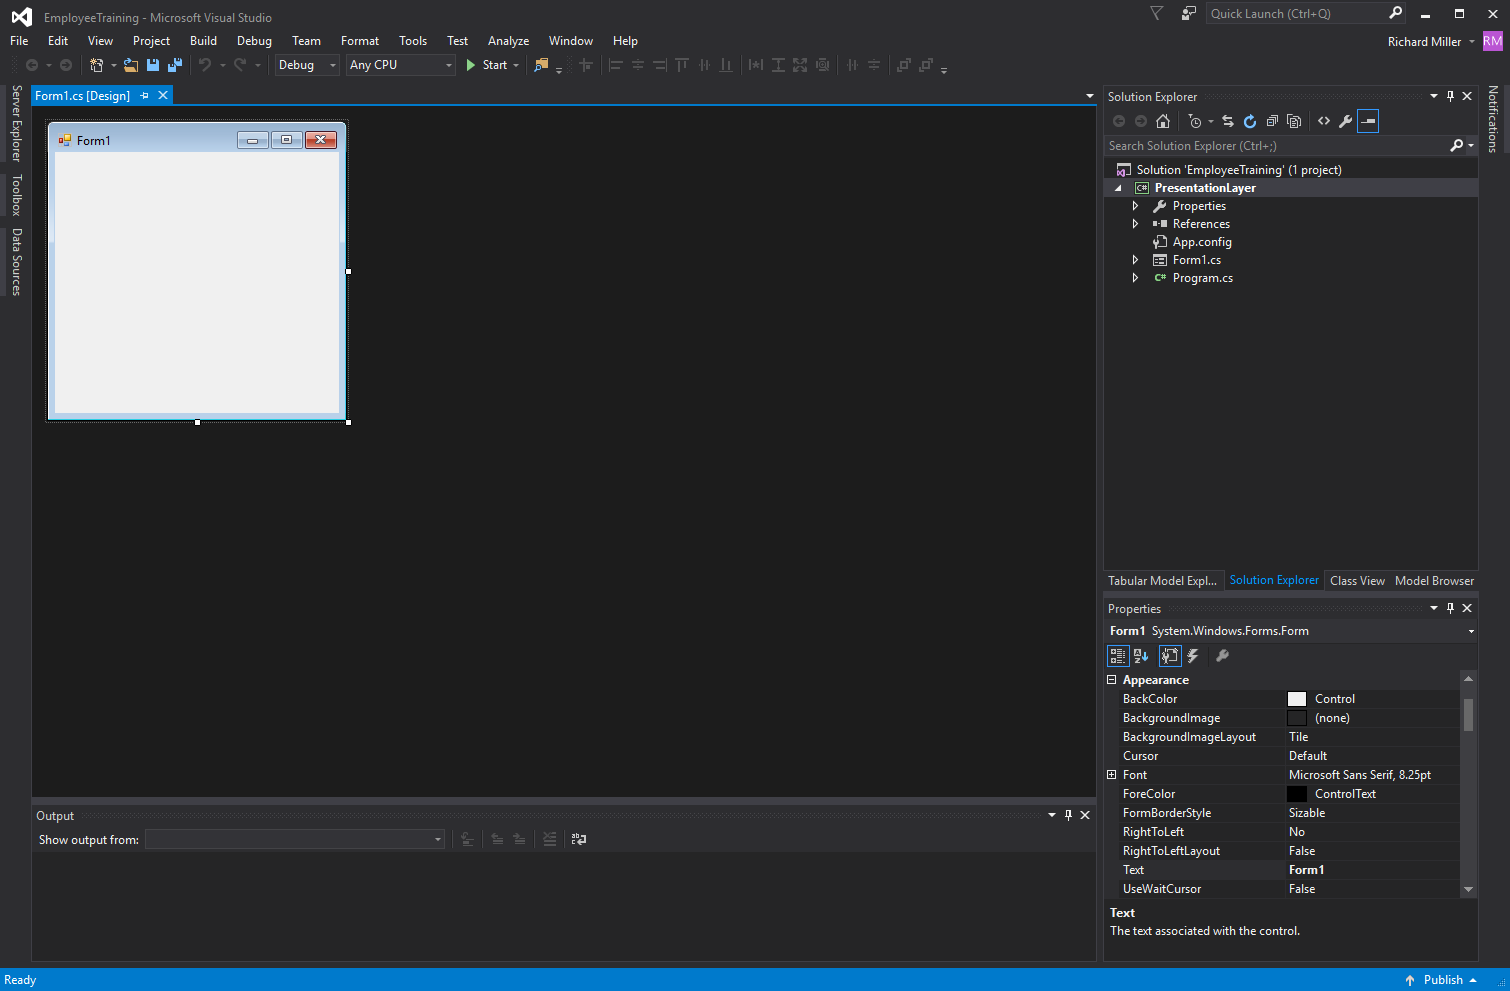
Figure 3 – Solution Created
At this point you can build and run the solution. Right click on the EmployeeTraining solution and select Build Solution, or click the Start button located to the right of the green triangle in the center of the menu.
Add Remaining Sub-Projects
You must now add the remaining sub-projects to the EmployeeTraining solution. I’ll start with the InfrastructureLayer project. Right click on the EmployeeTraining solution and click Add -> New Project… This will open the Add New Project window. Select Class Library from the list of available project types and name it InfrastructureLayer as is shown in figure 4.
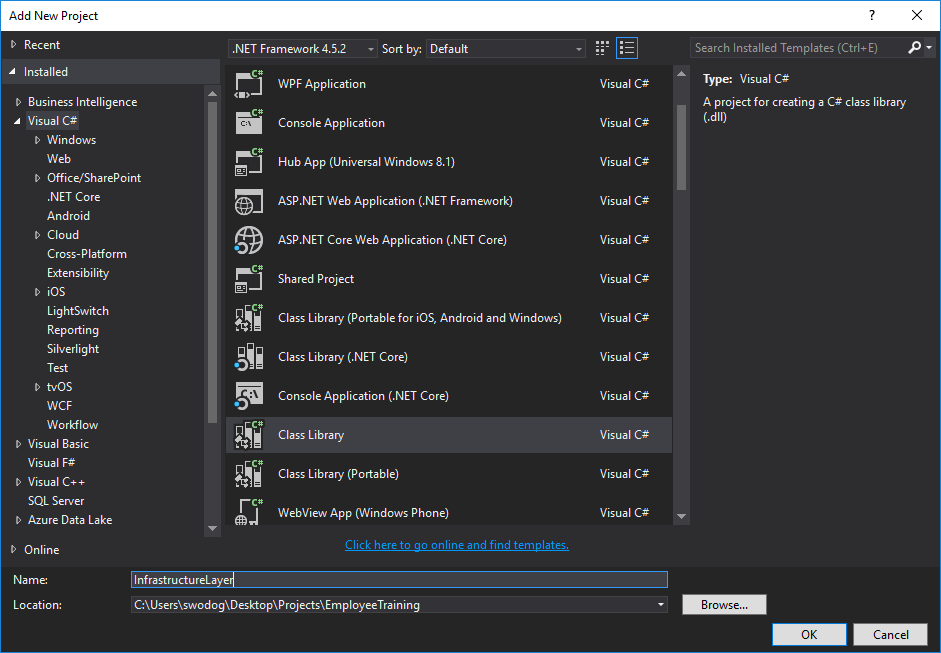
Figure 4 – Adding the InfrastructureLayer Project
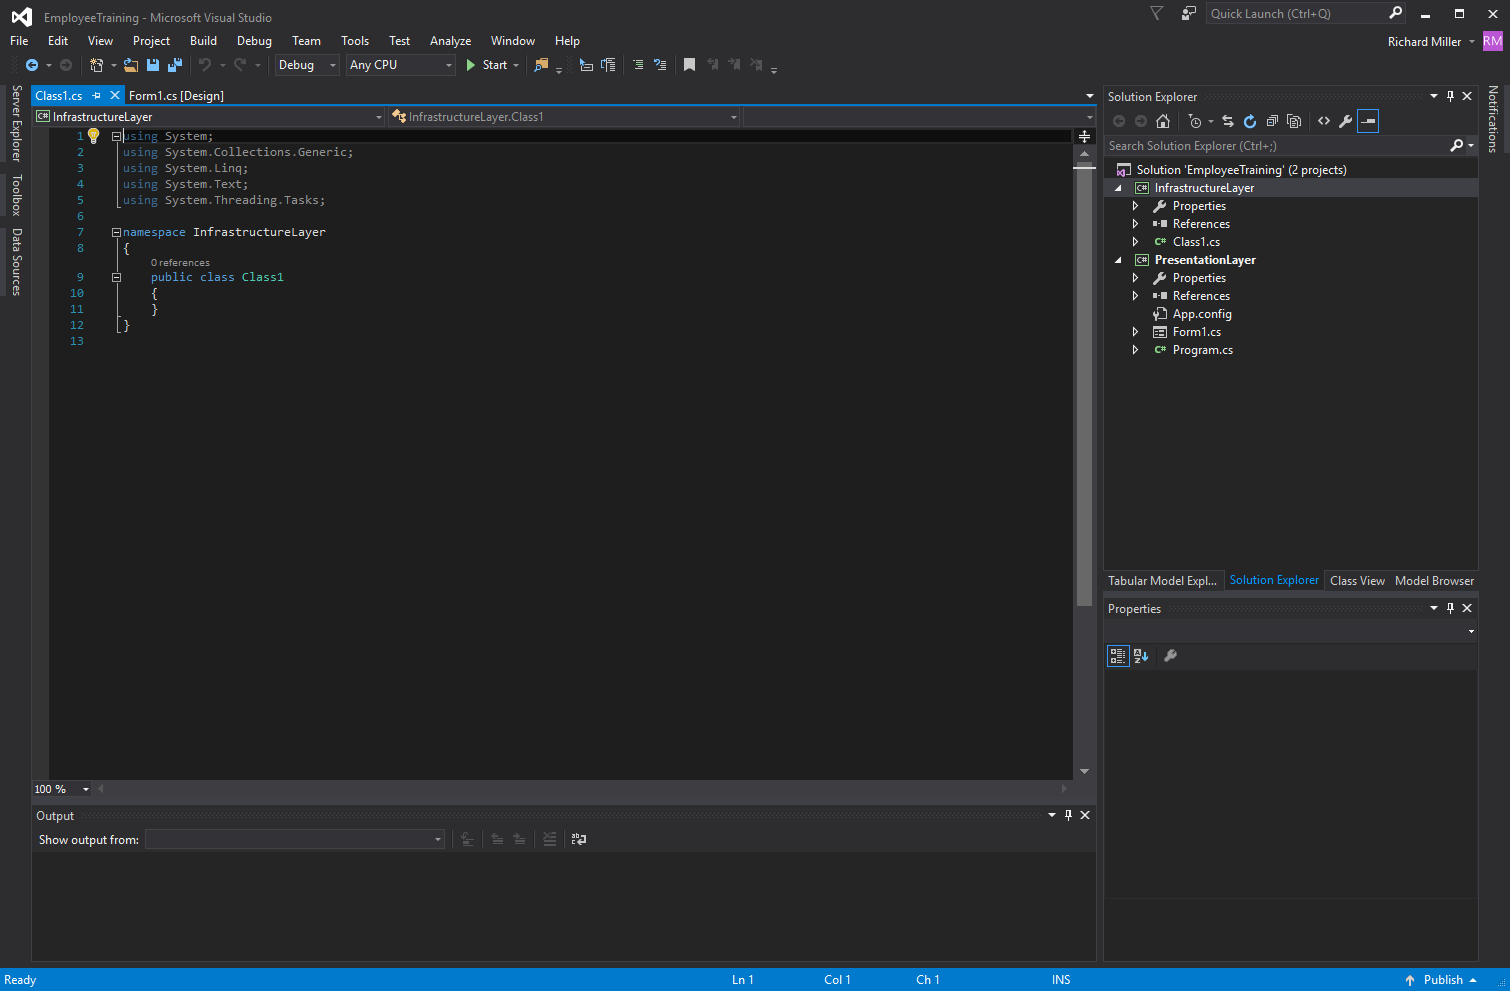
Figure 5 – InfrastructureLayer Project Added to Solution
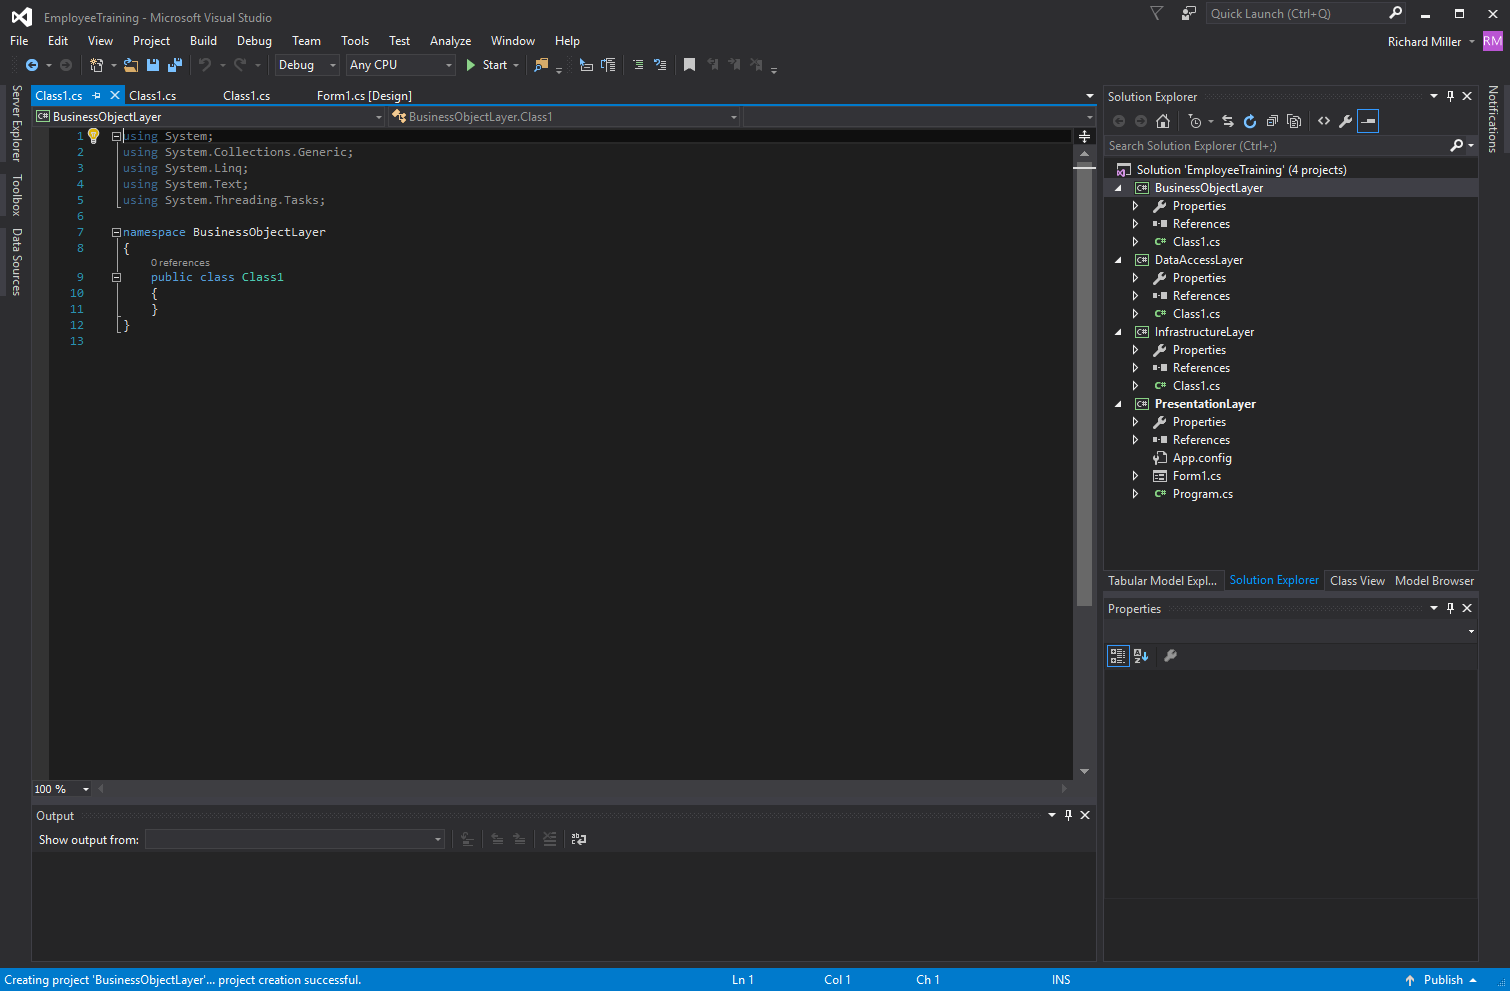
Figure 6 – All Sub-Projects Added to the Solution
Setting Project Dependencies
Right-click on the EmployeeTraining solution and select Properties from the pop-up menu. This will open the Solution Property Pages window as is shown in figure 7.
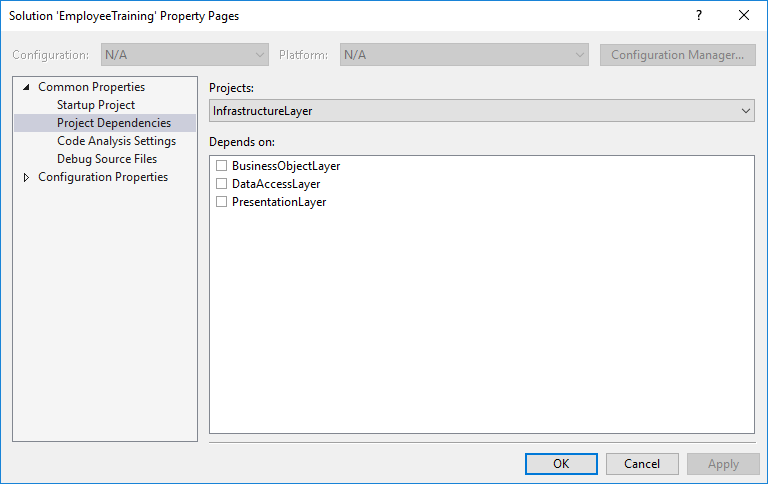
Figure 7 – InfrastructureLayer Project Dependencies
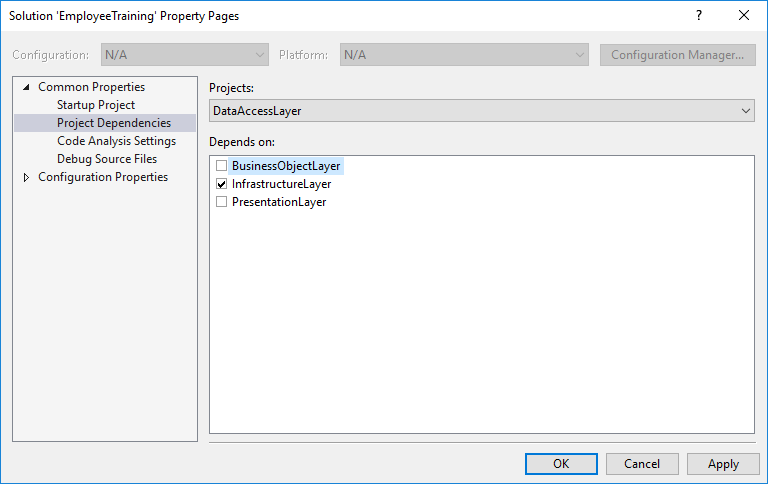
Figure 8 – DataAccessLayer Project Dependencies
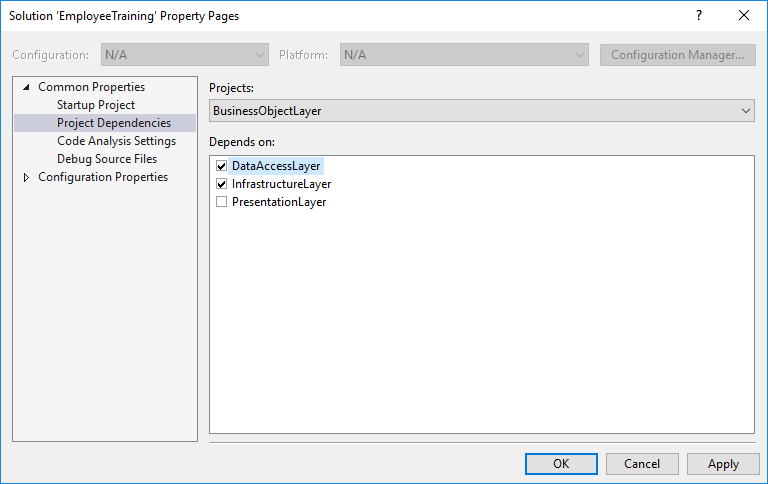
Figure 9 – BusinessObjectLayer Project Dependencies
Lastly, set the project dependencies for the PresentationLayer project as is shown in figure 10.
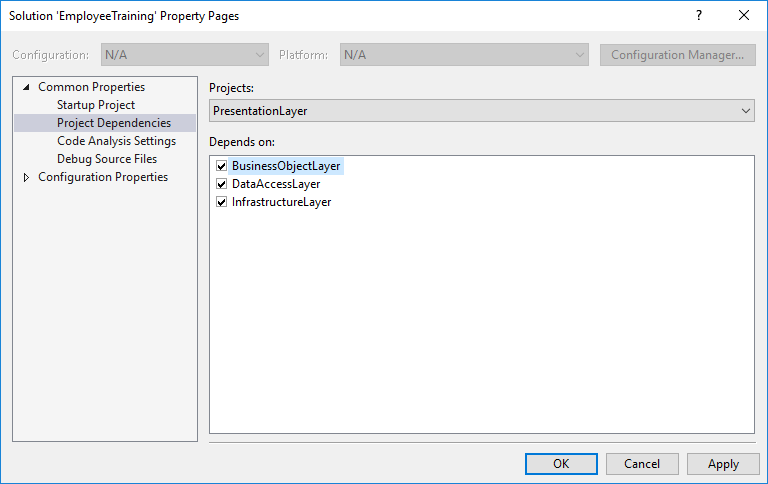
Figure 10 – PresentationLayer Project Dependencies
Next, you’ll need to add references to each sub-project.
Add Project References to Sub-Projects
All the sub-projects will depend on the InfrastructureLayer project, so you’ll need to add a reference to that project in each of the other sub-projects (PresentationLayer, BusinessObjectLayer, and DataAccessLayer). Let’s begin with the PresentationLayer. Right-click the References section under the PresentationLayer project and click Add Reference… This will open the Reference Manager window for the PresentationLayer project as shown in figure 11.
Figure 11 – Adding References to PresentationLayer Project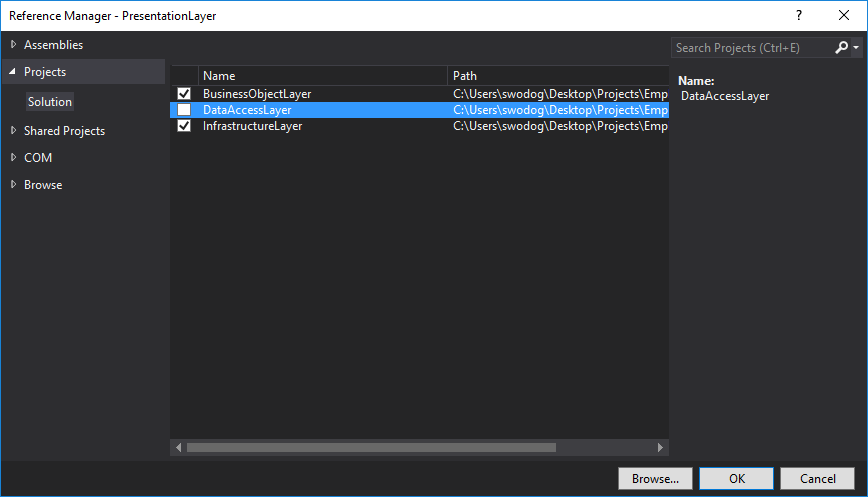
Parting Thoughts
Creating a large, complex software application requires serious up front thought about how the code will be organized. To often, novice software engineers jump straight into coding and later realize their architecture and IDE project organization is hindering progress. Take time up front to properly structure your project — doing so offers significant benefits and rewards.
Rick Miller
Falls Church, VA

